Hey there! So, you've got a new router and you're ready to get it up and running. Getting a new router installed and running smoothly really comes down to a few key stages. You’ll be physically plugging in the hardware, jumping into its configuration settings, and then tweaking those settings to get exactly what you need. When you're working with a business-grade Cisco or Cisco Meraki router, this gets a lot easier thanks to its cloud dashboard. This lets you manage everything remotely, from setting up a Captive Portal for guests to implementing secure authentication solutions.
Your Guide to a Flawless Router Installation
Ready to get your network up and running? I know installing a new router, especially a professional one like a Cisco model, can feel a bit daunting. But don't worry, you can definitely handle it. Think of this guide as your friendly manual, walking you through every step of the process with practical, hands-on advice. We're going to skip the generic tips and get straight to building a powerful, secure network that’s actually designed for your specific needs.
Whether you're setting this up for a bustling Retail shop, a sprawling Education campus, or a Corporate office with a Bring-Your-Own-Device (BYOD) policy, getting the initial configuration right is crucial. We’ll cover everything from the moment you open the box to configuring advanced features that deliver real business value.
By the time we're done, you'll have a network that's not just reliable but also packed with useful features, such as:
- Captive Portals to engage with customers in a Retail environment.
- Secure authentication methods like IPSK and EasyPSK for Corporate BYOD policies.
- Dependable connectivity for essential operations in Education, like schools and universities.
Why a Solid Network Foundation Matters
Before we get our hands dirty with the installation, it helps to have a quick refresher on how all the pieces of a modern network fit together. Understanding the basics makes the whole process feel much more intuitive. For a really solid overview, I'd recommend checking out this resource on Routers, Switching & Wifi.
This background knowledge is more critical than ever. The global router market was valued at around $42 billion in 2023 and is expected to soar to nearly $75 billion by 2032. This incredible growth is driven by the explosion of smart devices and the Internet of Things (IoT), making a stable, high-performing network an absolute necessity for any business.
The real goal of a great installation isn't just about connecting wires. It’s about building a network that actively supports your objectives, whether that's providing top-notch guest Wi-Fi in your cafe or securely connecting hundreds of student laptops across a campus in the Education sector.
A Quick Look at Our Installation Roadmap
To make this process as clear as possible, I've broken down the installation into a series of key milestones. This table gives you a high-level view of what we'll tackle together.
| Milestone | What It Involves | Why It Matters |
|---|---|---|
| Preparation | Gathering your equipment and finding the ideal physical location for the router. | A good spot ensures better signal coverage and prevents issues later on. |
| Physical Connections | Properly connecting the router to your modem, power source, and network switch. | Incorrect wiring is the #1 cause of "it's not working" headaches. |
| Dashboard Configuration | Setting up your Wi-Fi name (SSID), password, and security protocols. | This is where you build the user experience and secure your network. |
| Splash Access Integration | Configuring the Captive Portal, user authentication solutions, and branding. | This step turns a basic network into a powerful marketing and security tool. |
| Testing & Optimization | Verifying connectivity, checking speeds, and fine-tuning settings for performance. | Ensures a flawless experience for every user from day one. |
Learning how to install a new router the right way from the beginning will save you countless hours of frustration and troubleshooting down the road. It guarantees your network is not only online but also secure, efficient, and ready for whatever you throw at it. Let’s get started.
Preparing Your Space for a Cisco Meraki Router
Before you even crack open the box on that new Cisco Meraki router, let's chat about prep. I’ve learned from experience that a little forethought here saves a lot of headaches later. This isn't just about clearing a space on a shelf; it's about being strategic to ensure you get the rock-solid performance Meraki is known for.
Think of this as laying the groundwork. Getting these details right from the start is what separates a frustrating, spotty network from a dependable one. This is especially true in demanding environments like Education, Retail, and anywhere you're managing Corporate BYOD.
Finding the Perfect Spot
Where you decide to place your router will make or break your Wi-Fi coverage. A bad spot creates dead zones and slow speeds, while the right location can blanket your entire area with a strong signal.
Here are some friendly tips I always follow:
- Go Central and High: Wi-Fi signals radiate out and down. By placing the router in a central spot and getting it up high—think a tall shelf or a wall mount—you give the signal the best possible path to spread out evenly.
- Avoid Obstructions: This is a big one. Thick walls made of brick, concrete, or even dense plaster are signal killers. Same goes for large metal objects like refrigerators or filing cabinets.
- Minimize Interference: Keep the router away from other electronics. The usual suspects are microwaves, older cordless phones, and even some Bluetooth devices that can muck up the 2.4 GHz band.
For a large Retail store, for instance, I'd look at mounting an access point to a ceiling beam right in the middle of the sales floor. In an Education setting like a school, placing APs in central hallways often provides the best coverage for multiple classrooms. The goal is always to minimize the distance and physical barriers between the router and your users.
The most common mistake I see is people tucking their router away in a closet or down in a basement corner. It might look cleaner, but you're crippling your Wi-Fi performance right out of the gate. Functionality has to win over aesthetics here.
Gathering Your Tools and Credentials
Once you’ve scouted the perfect location, it's time to get your gear in order. Having everything you need close by makes the physical installation go much smoother. You don't need a massive toolkit, just the basics.
Here’s a quick checklist of what to have on hand:
- Your New Cisco Meraki Router: Of course.
- Ethernet Cables: You'll need at least two good ones. One connects the router to your modem (your internet source), and the other is for plugging your computer in for the initial setup.
- Power Adapter: Use the one that came in the box.
- Meraki Dashboard Login: Make sure you have your username and password for the Cisco Meraki cloud dashboard. This is where all the real configuration magic happens.
This prep becomes crucial when you get into the more advanced features. Soon, you'll be setting up everything from a branded Captive Portal for your guest network to secure authentication solutions like IPSK or EasyPSK for corporate devices. Having your login info ready means you can pivot from the physical install straight to the cloud configuration without missing a beat.
For more detailed guides and technical walkthroughs, our knowledge base on installation is a fantastic resource to keep open in another browser tab. Nailing these foundational steps is your key to building a powerful and secure network that's perfectly tuned to your needs.
Making the Physical Connections
Alright, let's get this new router plugged in and ready to go. This is where the rubber meets the road, and we get your hardware physically connected. Don't worry, this part is much easier than it sounds, and I'll walk you through every cable and port. Getting these physical steps right is the foundation for everything else, whether you're setting up a slick Captive Portal for your Retail cafe or enabling secure authentication solutions for a Corporate BYOD environment in an Education setting.
Thankfully, modern business routers, especially from Cisco Meraki, are built for a plug-and-play experience. There are no secret handshakes or cryptic manuals here. It really just comes down to plugging the right cable into the right port.
This simple diagram lays out the core sequence for installing a new router.
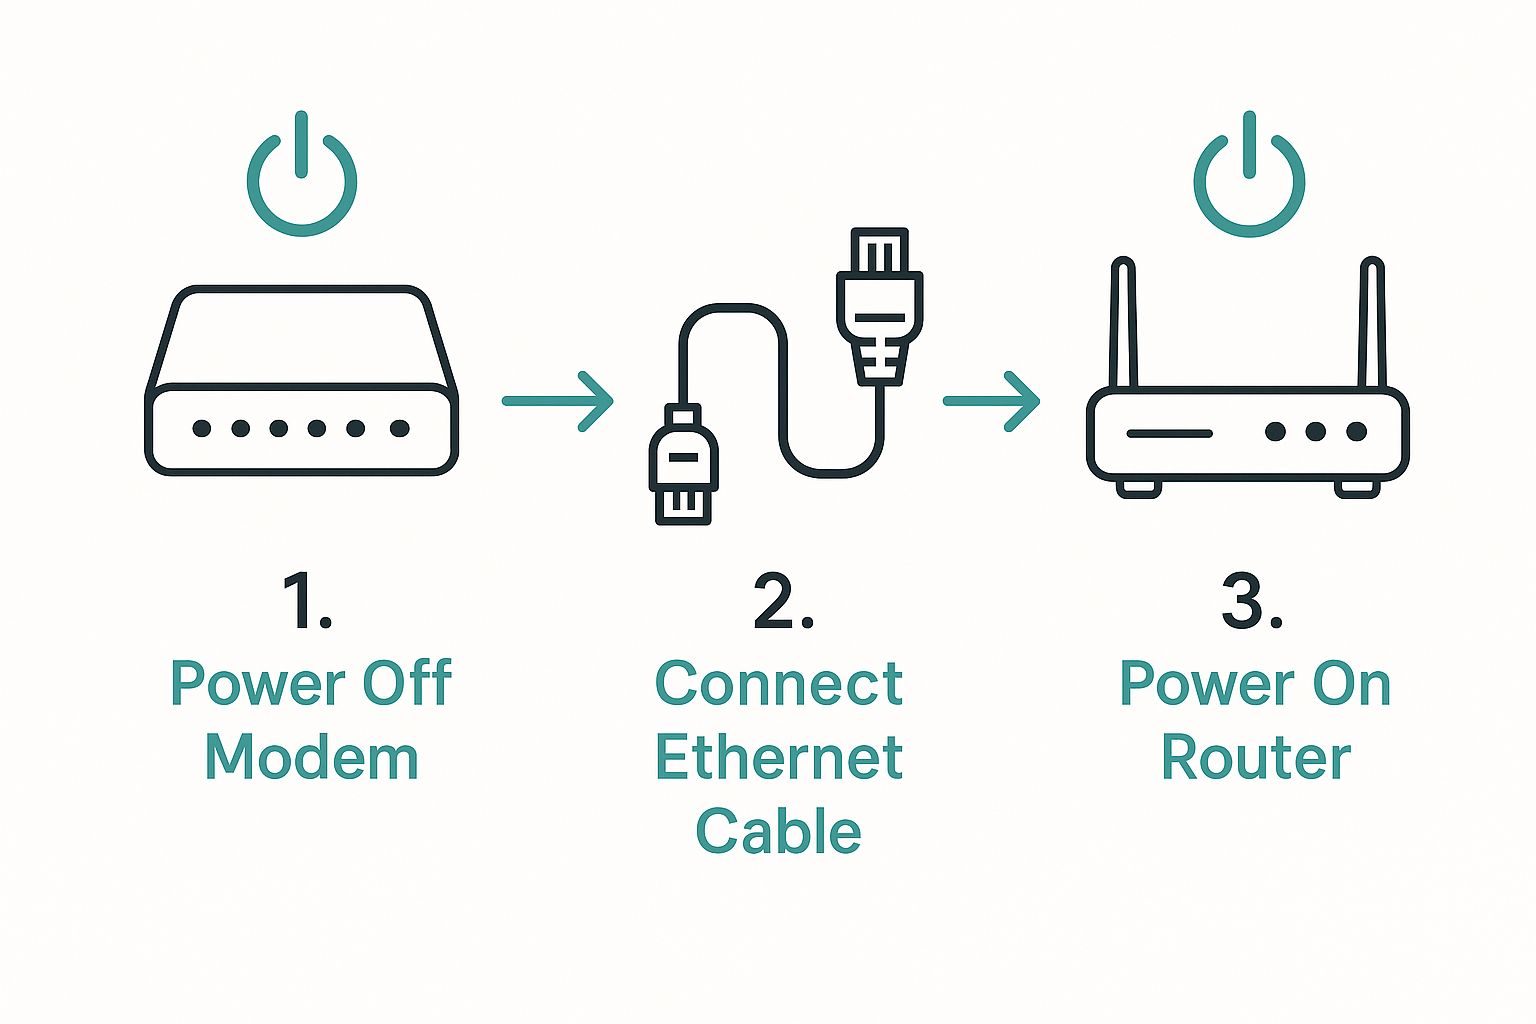
As you can see, powering down your modem first is a crucial step that many people skip. Trust me, it’s worth doing, as it ensures the modem can properly handshake with your new router when everything comes back online.
Powering Down and Plugging In
Before you touch a single cable, find your internet modem and unplug it completely from the power outlet. This is a critical first step. It forces the modem to clear its memory and properly recognize the new Cisco Meraki router once you power it back on.
With the modem powered off, grab an Ethernet cable.
- Plug one end into the modem's LAN port (this is the port that sends the internet signal out).
- Plug the other end into your new router's "Internet" or "WAN" port.
This port is usually colored differently to make it easy to spot. This single connection is what gives your entire network its link to the outside world.
Pro Tip: I always recommend using new, high-quality Ethernet cables. An old, frayed, or kinked cable can be an invisible bottleneck, causing slow speeds and random connection drops. It’s a small detail that can save you a lot of headaches later.
Connecting Your Local Network and Powering Up
Now it's time to connect your local devices. If you're wiring up an office, run another Ethernet cable from any of the router’s LAN ports to your main network switch. This is how you'll distribute the connection to all your wired computers and printers. If you're just connecting a single computer for the initial setup, you can plug it directly into one of these LAN ports instead.
With all the data cables in place, it’s time to bring it to life. First, plug your modem back into the power outlet and give it a minute or two to fully boot up. You’ll see its lights blink and eventually stabilize.
Once the modem is ready, go ahead and plug your new Cisco Meraki router into its power source.
This is where the magic happens. Your router will start its boot-up sequence, and its indicator lights will begin to flash—often cycling through amber, white, and finally settling on a solid color (usually white or green) once it has connected to the Meraki cloud and grabbed an internet connection. That final, solid light is your visual confirmation that the hardware is online and working as expected.
The growth in this space has been massive. The North American router market expanded from approximately $5.9 billion in 2021 and is on track to hit $8.1 billion in 2025, with cloud management becoming a standard feature.
Cable Management and Final Checks
Before you jump into the software configuration, take a moment to tidy up. A clean setup isn't just for looks; it prevents accidental unplugs and makes future troubleshooting much simpler. Grab some cable ties or Velcro straps and bundle the power and Ethernet cords neatly. For a truly professional look, you might want to incorporate some effective cable management ideas for your networking closet.
This level of polish is especially important in any guest-facing environment like Retail or Education. A neatly installed network inspires confidence, which is a fantastic first impression for customers or students.
Now that the physical work is done, you're ready to dive into the Meraki Dashboard and start building your network.
Configuring Your Cisco Meraki Router in the Cloud
Alright, with your new router plugged in and powered up, it’s time to move from the physical hardware to the software side of things. This is where you get to mold your network using the Cisco Meraki cloud dashboard. If you've ever wrestled with clunky, traditional router interfaces, you'll find Meraki's dashboard is a welcome change—it makes even complex configurations feel surprisingly simple.
We’ll start with the essentials, like naming your network (the SSID) and setting a solid password. But that's just the beginning. The real magic of a Cisco Meraki setup lies in its more advanced features, which we'll get into next.
Setting Up Your First Wireless Network (SSID)
Your first job inside the dashboard is to create the wireless network people will actually connect to. Think of an SSID as the public name for your Wi-Fi, like "TheCoffeeSpot_Guest" or "MainOffice_WiFi."
Creating one is straightforward. You’ll just navigate to the wireless settings, give your network a name, and pick your security settings. This first step is your primary line of defense, so it's worth getting it right from the outset.
This isn't just a technical task; it's about shaping the user experience. A clear, professional SSID name makes your organization look polished and helps people connect with confidence, knowing they're on the right network.
The beauty of a cloud-managed system like Meraki is how fast these changes take effect. You can create, modify, or even delete networks from anywhere you have an internet connection, giving you total control without ever having to touch the router again.
Unlocking Value with a Captive Portal
Now, let's look beyond a simple password-protected network. For any business that has guests—whether it's a Retail shop, a hotel, or a clinic—a Captive Portal is an absolute game-changer. This is the branded login page users see before they get full internet access.
Instead of just being a gate, a Captive Portal turns your free Wi-Fi from a cost center into a powerful business tool. You can use it to:
- Showcase your brand: Feature your logo, colors, and current marketing messages.
- Post terms and conditions: Make sure users agree to your usage policy before connecting.
- Engage with customers: Once they log in, you can redirect them to your website, social media, or a page with special offers.
Setting this up in the Cisco Meraki dashboard is really just a matter of picking your splash page settings and tweaking the design. What used to be a complicated feature is now accessible to just about anyone, helping businesses in sectors like Retail and Education create a professional and engaging welcome for their visitors.
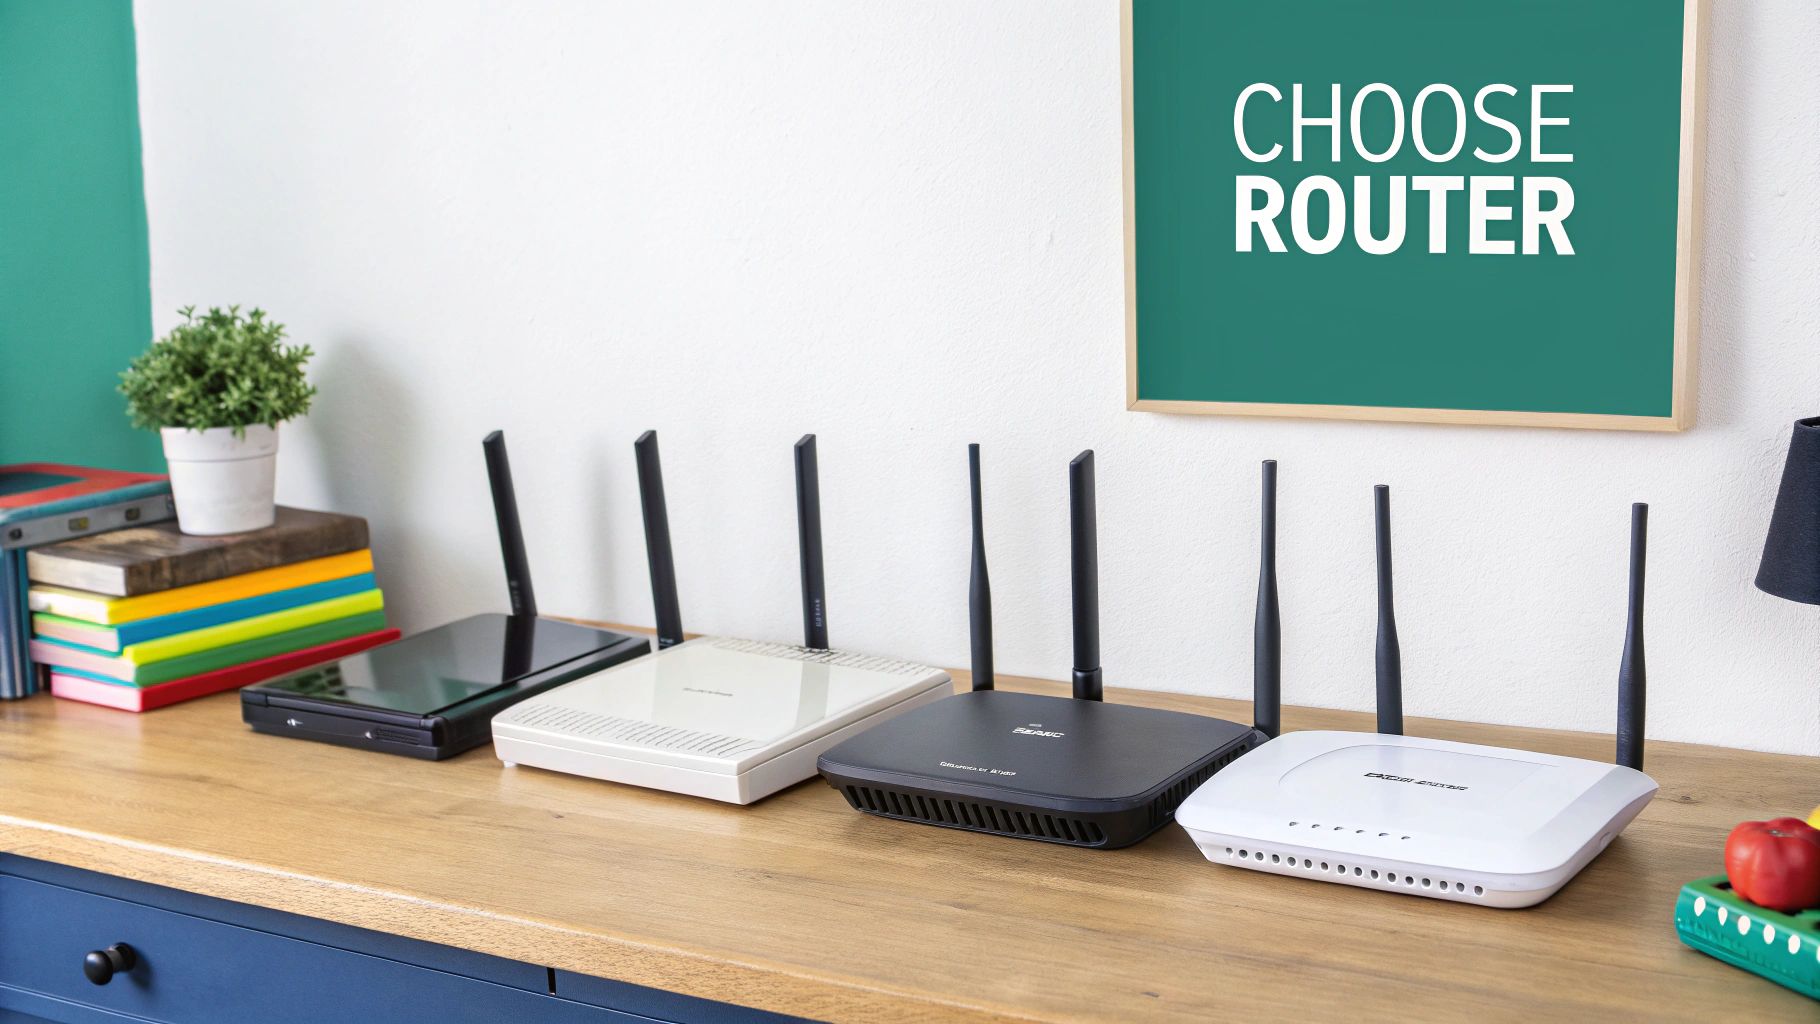
The image below shows the kind of Wi-Fi hardware that serves as the foundation for these powerful cloud features.
These devices are built from the ground up to work seamlessly with the Meraki cloud, which makes rolling out features like Captive Portals a smooth and painless process.
Securing Modern Networks with Advanced Authentication Solutions
In today's world, especially in Education and Corporate BYOD environments, relying on a single shared password for everyone is a major security risk. If an employee leaves or a student's device is compromised, you're stuck with the headache of changing the password and updating it on every single device. This is precisely where modern authentication solutions come into play.
By integrating Splash Access with Cisco Meraki, you gain access to powerful tools like IPSK (Identity Pre-Shared Key) and EasyPSK. These technologies let you keep one simple network name but assign a unique, private password to every single user or device.
This approach brings some huge advantages:
- Individual Control: You can grant or revoke access for one specific user instantly, without disrupting anyone else.
- Tighter Security: If a key is compromised, it only affects a single user, not your entire network.
- Easier Onboarding: Users can often self-register their own devices, which takes a significant load off your IT team in Corporate and Education settings.
For a school managing thousands of student devices or a company with a flexible BYOD policy, EasyPSK isn't just a nice feature—it's a fundamental change in how network security is handled, making it both stronger and simpler. You can see how these solutions work across different hardware by exploring various enterprise Wi-Fi access points.
This shift is part of a much larger industry trend. The global router and switch market was valued at an impressive $55.19 billion in 2024 and is expected to grow to $78.87 billion by 2029. This boom is driven by the digital-first push in every sector and the adoption of new Wi-Fi standards. Within this trend, software-defined networking (SDN) is what allows platforms like Cisco Meraki to offer remote, automated configurations, turning the once-daunting task of how to install a new router into a much more manageable process. By using these advanced features, you’re not just setting up Wi-Fi; you're building a smart, secure, and future-ready network.
Testing and Optimizing Your New WiFi Network
Alright, you’ve got the new Cisco Meraki router configured, and the dashboard is lit up green. That’s a great feeling! But hold on, don't crack open the victory snacks just yet. We've reached the final, and frankly, most critical phase: testing and optimization. This is where we make sure the network that looks perfect on paper actually delivers a flawless experience in the real world.
This isn't just about a quick signal check. We need to put ourselves in the shoes of the people who will be using this network every day. A truly great network is one that just works—it's fast, reliable, and completely invisible to the user.

Validating the User Journey
The absolute best way to test your setup is to become the user. This is especially true for specialized environments like Retail stores, Education campuses, or Corporate BYOD scenarios. Each one has its own unique quirks and potential friction points.
Let's walk through a few real-world examples:
- For a Retail Store: Pull out your phone and connect to the guest WiFi. How quickly does the Captive Portal pop up? Does it look good and is it easy to navigate on a small screen? A clunky or slow-loading portal can easily frustrate a customer and send them walking.
- For an Education Campus: Imagine you're a new student with a brand-new laptop. Go through the process of onboarding it with EasyPSK. Is the self-service portal clear and intuitive? A student should be able to get their unique key and connect to the secure network without ever having to call the helpdesk.
- For a Corporate Office: Grab a personal tablet and pretend you're an employee connecting it to the BYOD network. Run through the IPSK authentication. Is it a smooth process? More importantly, does your connection stay stable as you walk from your desk to the conference room?
Testing the user journey is non-negotiable. This is how you spot the small annoyances before they snowball into big frustrations for your users. A smooth login experience using authentication solutions sets the entire tone.
Performance Testing Across Your Space
Once you’ve confirmed the login and authentication flows are solid, it's time to check the raw performance. The mission here is simple: hunt down any weak spots or coverage dead zones.
First, do a few speed tests right next to the router. This gives you a performance baseline. Then, with a laptop or smartphone in hand, start walking the entire space. Make sure to run speed tests in all the key locations:
- The far corners of the Retail sales floor or Corporate office.
- Inside every conference room and classroom in your Education facility.
- In high-traffic spots like break rooms and common areas.
- Right at the edge of where you expect coverage to end.
What you're looking for are noticeable drops in speed or, worse, areas where the signal vanishes completely. These are your dead zones. If you find any, you'll likely need to nudge your Cisco Meraki access point to a slightly different position or even add another one to fill that coverage gap. Don't just ignore these spots; if you run into consistent trouble, it’s worth looking into common problems with WiFi routers to see what might be causing them.
The Final Optimization Checklist
Before you officially sign off on the project, a quick final check-in can save a lot of headaches down the road. This list helps you catch common things that are easy to miss.
- Check Signal Strength: Use a WiFi analyzer app for a more technical view of your signal (measured in dBm) as you move around.
- Verify Authentication Methods: Jump back into the Cisco Meraki dashboard and just double-check that all your authentication solutions like IPSK and EasyPSK are active and configured correctly.
- Test Band Steering: If you have it enabled, make sure dual-band devices are hopping onto the faster 5 GHz network when they're close enough.
- Review Client Lists: Take a peek at the client list in the dashboard. Are devices connecting as you expect? See any clients with persistently weak signals? They might be your first trouble tickets.
Taking the time for this final validation is what separates a good-enough install from a truly professional one. It ensures all the effort you put into how to install a new router results in a network that is powerful, secure, and genuinely a pleasure for everyone to use.
FAQs on Installing a New Router & Using Advanced Features
So, you’ve followed the guide on how to install a new router, and your new Cisco Meraki hardware is up and running. That's a huge step, but it's often at this point that the real questions start to pop up. Getting the devices online is just the beginning; the magic happens when you start using the features that turn your Wi-Fi into a powerful business asset.
We get a lot of questions from organizations in Retail, Education, and Corporate settings, so let's walk through some of the most common ones we hear from people just like you.
What’s a Captive Portal, and Why Should My Business Use One?
Ever connected to Wi-Fi at a coffee shop or hotel and seen a branded login page first? That, my friend, is a Captive Portal. Think of it as the friendly welcome mat for your guest network.
Instead of just giving out a password, a Captive Portal presents a custom-branded page to every user. For any public-facing venue—from a Retail store to an Education campus lobby—this is a golden opportunity.
You can use it to:
- Showcase your logo and share current promotions.
- Require users to accept your terms of service.
- Guide visitors to your social media or website after they connect.
Suddenly, your free Wi-Fi isn't just an expense; it's a direct marketing and engagement tool.
How Can EasyPSK Make BYOD Security Less of a Headache?
Bring Your Own Device (BYOD) is the new normal in most Corporate and Education environments. The problem? Managing security with a single, shared Wi-Fi password for hundreds of personal devices is a recipe for disaster. This is exactly what authentication solutions like EasyPSK were built to solve.
EasyPSK completely changes the game for BYOD security. Rather than one password for the entire network, it lets you generate a unique, private key for each user or device.
This approach gives you granular control. When an employee leaves the company or a student loses their phone, you just deactivate their specific key. Nobody else is affected. It’s a beautifully simple, scalable, and far more secure way to handle a modern network, making it a must-have for Corporate and Education sectors.
Do I Have to Manually Update My Router’s Firmware?
This is one of the biggest reliefs for anyone who has managed traditional network hardware. With a Cisco Meraki router, the answer is a resounding "no." Forget hunting for firmware files and scheduling maintenance windows for updates.
Meraki devices are cloud-managed, meaning all firmware updates and security patches are pushed out automatically from the Cisco cloud. Your network stays secure and up-to-date with the latest features without you having to lift a finger. Keep in mind, sometimes poor performance isn't about firmware but physical placement, so it's always good to know how to fix interference with WiFi if problems crop up.
This hands-off approach is a massive advantage for any busy IT team, letting you focus on bigger things while your network takes care of itself.


